ShellFrame & Dashboard
Overview
This sample shows how we can create and show a simple dashboard. We display our own content in this dashboard and also allow users to restores the default content to the listing area. We will use React js framework for implementing the logic of the application.
Dashboard
Application Manifest file
First we should create Application Manifest file(appdef.xml) and specify our UI extension application data, such as the dashboard id which is required for creating it.
- XML
<?xml version="1.0"?>
<application xmlns:xsi="http://www.w3.org/2001/XMLSchema-instance" xsi:noNamespaceSchemaLocation="http://www.m-files.com/schemas/appdef-client-v5.xsd">
  <guid>2c68aa24-4f5b-4d03-af09-0d1d8035746d</guid>
  <name>Shellframe - dashboard</name>
  <version>0.1</version>
  <description>A basic application showing how to work with Shellframe.</description>
  <publisher>M-Files Corporation</publisher>
  <enabled-by-default>true</enabled-by-default>
  <modules>
    <module environment="shellui">
      <file>shellui.js</file>
    </module>
  </modules>
  <dashboards>
    <dashboard id="MyDashboard">
      <content>index.html</content>
    </dashboard>
  </dashboards>
</application>
Creating main menu
Now we create a module file to contain our actual application logic(shellui.js). In this file we add our custom command which is used to open our dashboard. To open the dashboard we call ShowPopupDashboard from shellframe instance.
- JavaScript
// NOTE! This code is for demonstration purposes only and does not contain any kind of
//       error handling. MUST be revised before using in production.

function OnNewShellUI(shellUI) {
  /// <summary>Executed by the UIX when a ShellUI module is started.</summary>
  /// <param name="shellUI" type="MFiles.ShellUI">The shell UI object which was created.</param>

  // This is the start point of a ShellUI module.

  // Register to be notified when a new shell frame (MFiles.Event.NewShellFrame) is created.
  shellUI.Events.Register(MFiles.Event.NewShellFrame, onNewNormalShellFrame)
}

function onNewNormalShellFrame(shellFrame) {
  // Add tab to right pane, when the shell frame is started.
  shellFrame.Events.Register(MFiles.Event.Started, onStarted)

  // NOTE: to be on the safe side, handle the callback in "async" function and await all the
  // return values, because when the postMessage API is used, all return values will be async.
  async function onStarted() {
    const dashboardCommand =
      await shellFrame.Commands.CreateCustomCommand('Show my dashboard')
    await shellFrame.Commands.AddCustomCommandToMenu(
      dashboardCommand,
      MFiles.MenuLocation.MenuLocation_TopPaneMenu,
      1,
    )
    await shellFrame.Commands.Events.Register(
      MFiles.Event.CustomCommand,
      (command) => {
        // Execute only our custom command.
        if (command === dashboardCommand) {
          shellFrame.ShowDashboard('MyDashboard')
        }
      },
    )
  }
}
Creating the dashboard file
Next we will create a dashboard file that will be shown in the listing view area. This is a simple html file that contains our own content.
- HTML
<!doctype html>
<html lang="en">
  <head>
    <title>My Dashboard</title>
    <meta charset="utf-8" />
    <script src="mfiles.extensibility.protocol.js"></script>
  </head>
  <body>
    <div id="root">
      <h2>Welcome to M-Files!</h2>
    </div>
  </body>
</html>
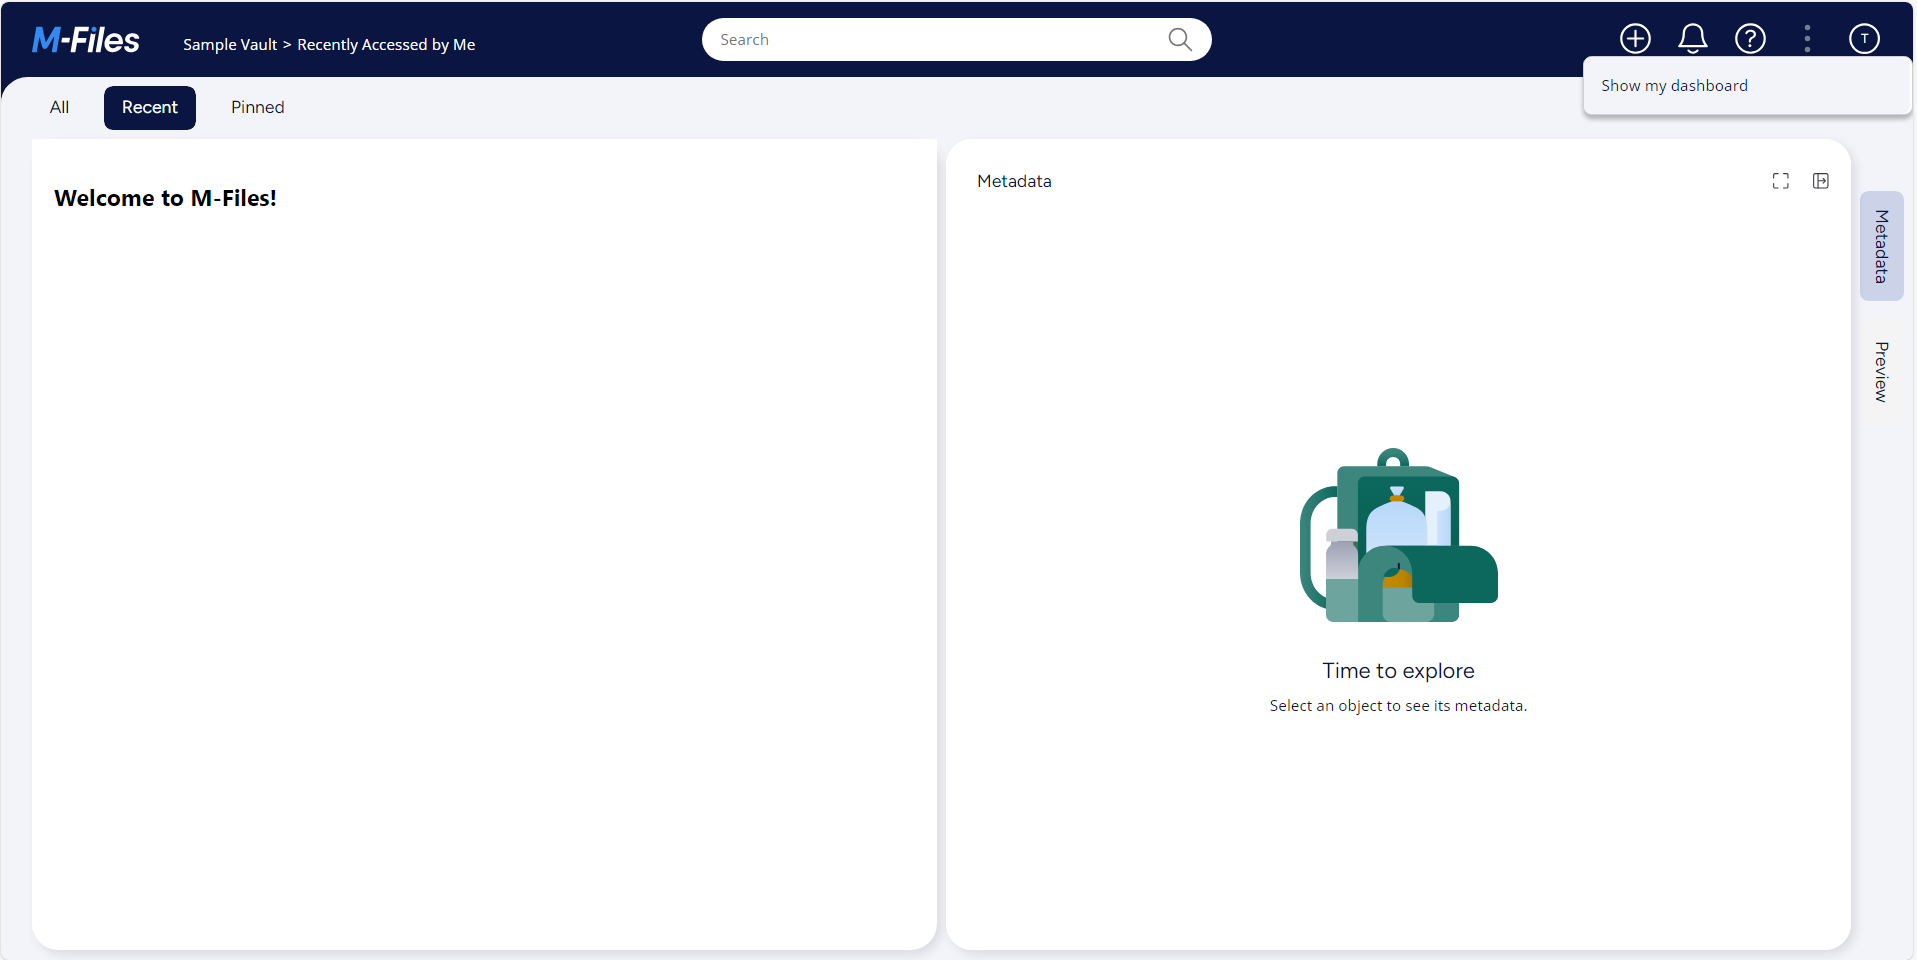
After installing our application in M-Files via M-Files Admin and logging into the M-Files vault, we can see our custom command Show my dashboard. This custom command opens our dashbord in listing view area.

Dashboard handler
Let's add some dynamic content to our dashboard. First we modifying index.html file to add styles file(style.css) and dashboard handler(index.js).
- HTML
<!doctype html>
<html lang="en">
  <head>
    <title>Dashboard</title>
    <script src="mfiles.extensibility.protocol.js"></script>
    <link href="style.css" rel="stylesheet" />
  </head>
  <body>
    <div id="root"></div>
    <script src="bundle.js"></script>
  </body>
</html>
In this simple example, we retrive the current path from CurrentPath of shellFrame object and display on our dashboard. Whenever our application is loaded, OnNewDashboard is called and the content of the dashboard is updated.
We use React JS framework to implement the dashboard handler in index.js file, then bundle it in bundle.js file. You can use your favorite tool for bundling.
- JavaScript
import React from 'react'
import ReactDOM from 'react-dom'

function App(dashboard) {
  const shellFrame = dashboard.ShellFrame

  return (
    <div>
      <h1>My dashboard</h1>
      <div>
        Current path: <span class="label">{shellFrame.CurrentPath}</span>
      </div>
    </div>
  )
}

window.OnNewDashboard = (newDashboard) => {
  ReactDOM.createRoot(document.getElementById('root')).render(App(newDashboard))
}
Also we need to add our style file.
- CSS
html,
body {
  font-family: Lato, 'Segoe UI', Sans-Serif;
  margin: 0;
  background: #fff;
  height: 100%;
  font-size: 14px;
  padding: 0 10px;
}

div {
  padding: 2px 0;
}

button {
  width: 150px;
  height: 20px;
}

.label {
  font-weight: 500;
  color: mediumblue;
}
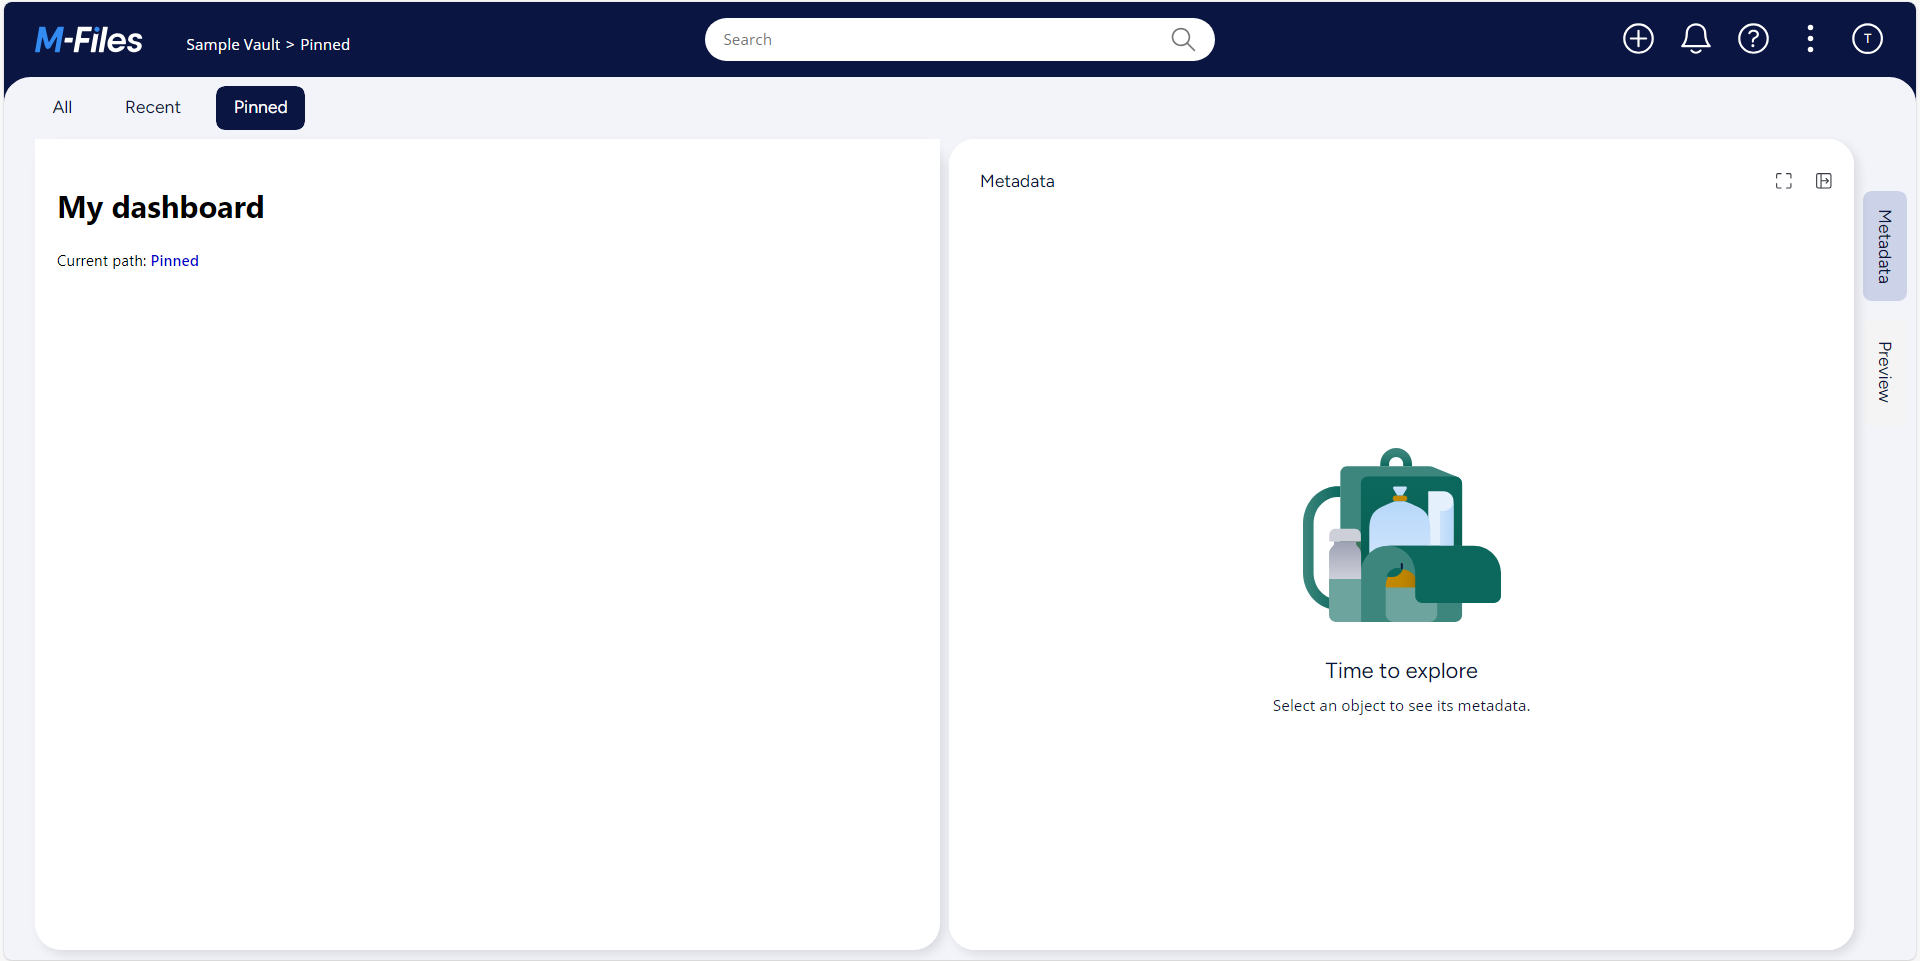
Now if you install the application you can see the result:

As our last path, before opening our applicatin was Pinned, you can see that Current path value is Pinned.
Restoring default content
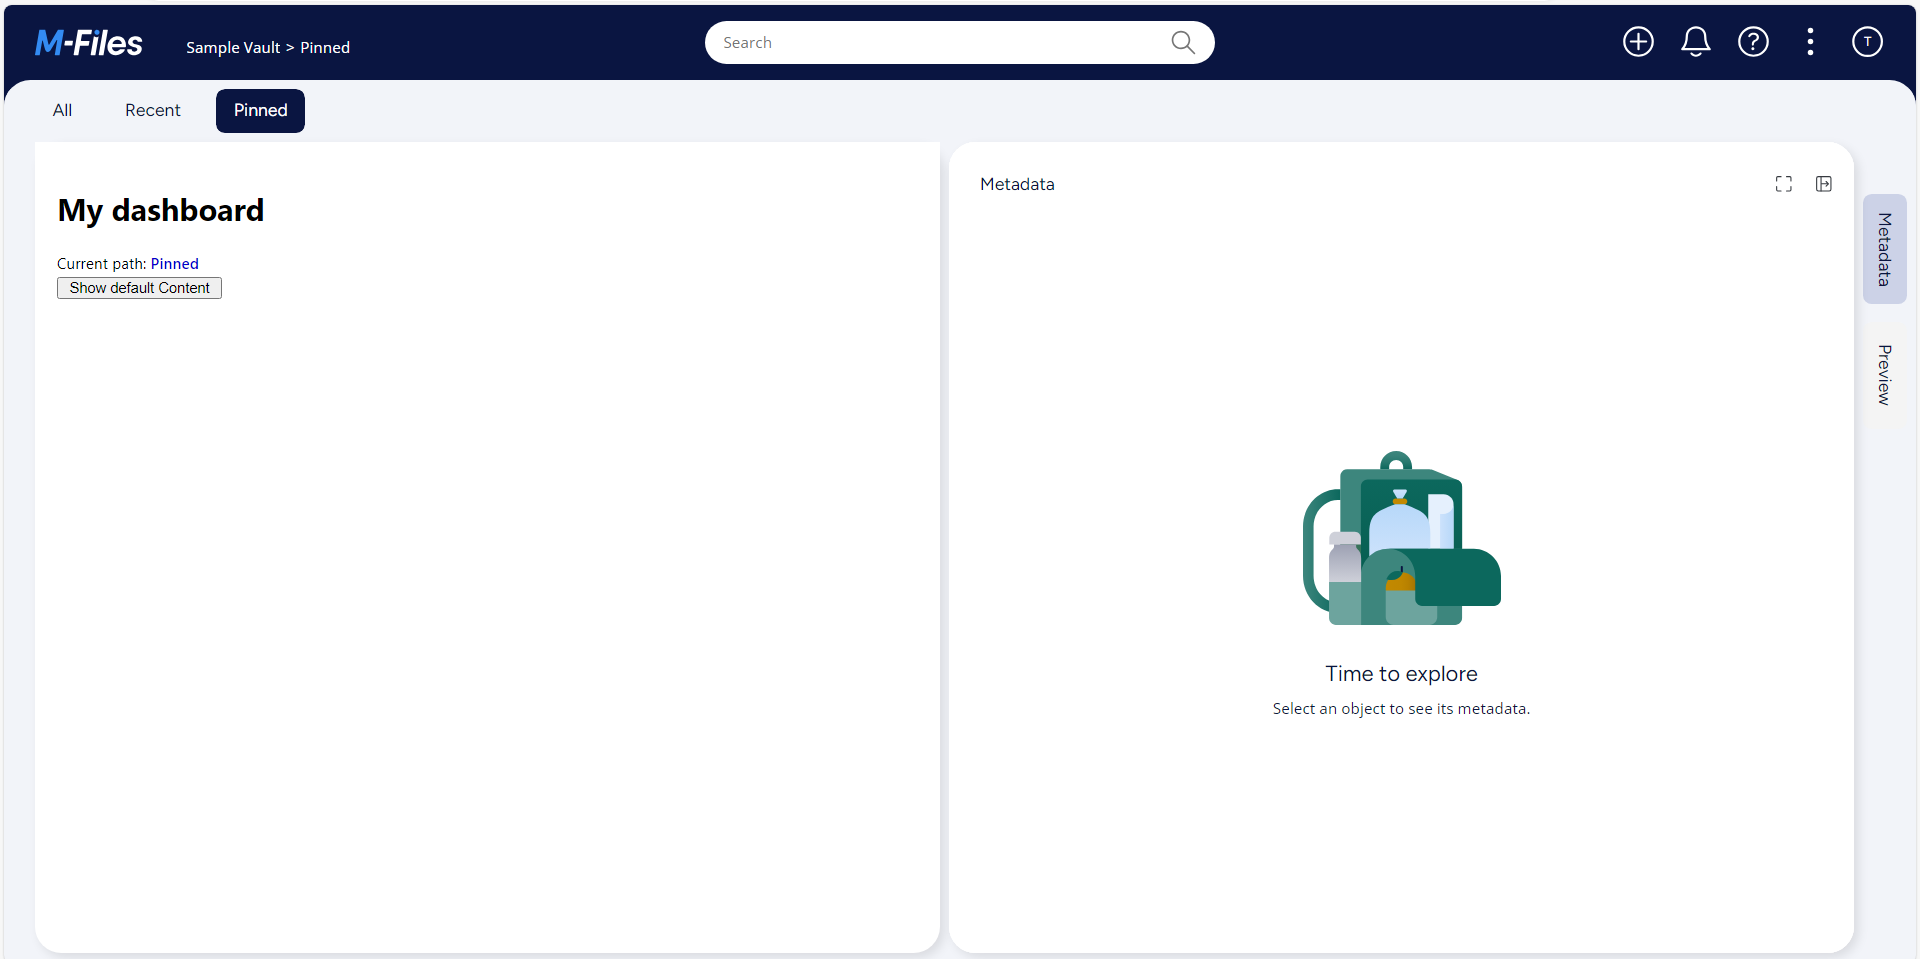
In some point maybe we want to restore the dashboard to the default content. In this we can call ShowDefaultContent of shellFrame object.
- JavaScript
import React from 'react'
import ReactDOM from 'react-dom'

function App(dashboard) {
  const shellFrame = dashboard.ShellFrame

  const showDefaultContent = () => {
    shellFrame.ShowDefaultContent()
  }

  return (
    <div>
      <h1>My dashboard</h1>
      <div>
        Current path: <span class="label">{shellFrame.CurrentPath}</span>
      </div>
      <button type="button" onClick={showDefaultContent}>
        Show default Content
      </button>
    </div>
  )
}

window.OnNewDashboard = (newDashboard) => {
  ReactDOM.createRoot(document.getElementById('root')).render(App(newDashboard))
}

If the button is cliked the default content is shown again.